Carpenter bee damage is often associated with the perfectly round holes these insects drill into wood. However, one of the first signs homeowners notice is not the hole itself—it’s the stains and residue left behind. Yellowish-brown marks below entry holes, dark streaks on siding, or small spots of debris on decks and porches can all be signs of carpenter bee activity.
These droppings and stains occur as carpenter bees excavate nesting tunnels and move in and out of the wood. While the residue may seem like a minor cosmetic issue, it can provide valuable clues about active nesting sites and potential wood damage. Recognizing these signs early can help you address an infestation before it becomes more extensive and costly to repair.
In this guide, you’ll learn how to identify carpenter bee excrement, understand why these stains appear, and tell the difference between carpenter bee residue and similar materials, such as termite frass. You’ll also find practical advice for cleaning affected surfaces, protecting wood from future damage, and reducing the likelihood of carpenter bees returning. Whether you’ve spotted stains on a deck railing, porch ceiling, fence, or siding, this article will help you determine the cause and take the right next steps.
What Is Carpenter Bee Excrement?
Carpenter bee excrement is the waste material produced by carpenter bees as they feed, nest, and live inside wooden tunnels. While many people refer to it simply as “bee droppings,” the residue found around carpenter bee holes is usually more than just waste.
In most cases, the stains and spots you see on wood surfaces are a mixture of several materials, including:
- Digestive waste from nectar and pollen, the bee’s primary food sources
- Moisture released by the bee, which gives the residue a wet, streak-like appearance
- Fine wood particles created as the bee excavates tunnels
- Debris and organic material from inside nesting galleries and brood chambers
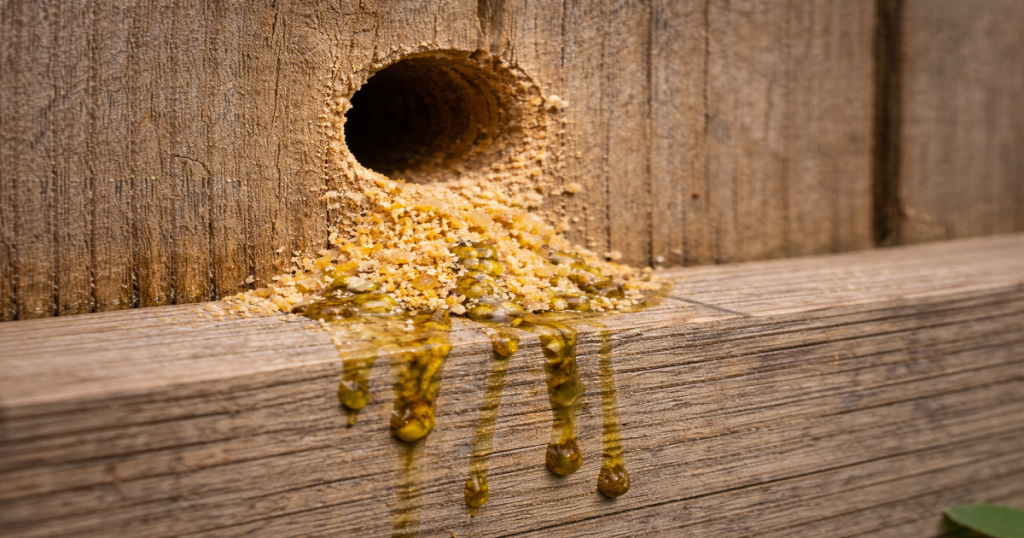
Because of this combination, carpenter bee residue looks and behaves differently from the dry pellets or dust produced by many other wood-boring insects. Instead of collecting in neat piles, it often appears as yellowish-brown stains, dark streaks, or splattered spots beneath entry holes.
The liquid content allows the material to soak into porous wood surfaces such as pine, cedar, and redwood, making stains difficult to remove if left untreated. In some cases, these marks may be visible long before significant structural damage becomes apparent.
For homeowners and pest control professionals, carpenter bee excrement is often one of the most useful signs of active nesting activity. When found directly below a perfectly round entry hole, it can help confirm that carpenter bees are currently using the tunnel and may indicate additional galleries hidden inside the wood.
What Does Carpenter Bee Excrement Look Like?
The Visual Pattern Most People Miss
When trying to identify carpenter bee activity, the color of the stain is only part of the story. The most reliable clue is often the pattern the residue creates.
In most cases, carpenter bee excrement forms a noticeable vertical stain directly beneath the nest entrance. This happens because waste and moisture are expelled from the tunnel opening and naturally run downward along the wood surface.
Typical signs of carpenter bee activity include the following:
- A smooth, perfectly round entry hole about ½ inch (12–13 mm) in diameter
- A yellow, amber, or light brown stain immediately below the hole
- Darker streaks or blotches that develop as the residue ages
- Multiple overlapping stains in long-term infestations, creating a layered or smeared appearance
Unlike dirt, mildew, or water stains, these marks usually have a clear starting point—the entrance hole above them. Following the stain upward often leads directly to the source of the problem.
Texture and Surface Behavior
The appearance of carpenter bee residue changes over time, which can provide clues about how recently the bees have been active.
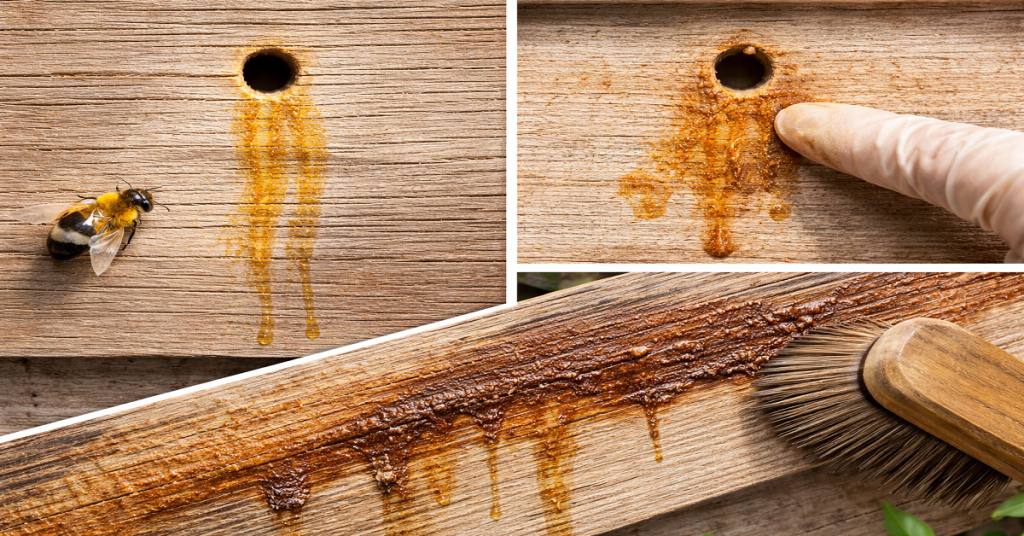
Fresh residue is typically the following:
- Moist or slightly sticky
- Glossy in appearance
- Easy to smear when touched
- Dry and crusty
- Darker in color
- More difficult to remove from the surface
As the material ages, it gradually becomes
The type of wood also affects how noticeable the staining becomes. On painted or sealed surfaces, the residue often remains on top of the finish and can usually be cleaned without much difficulty. On unfinished, weathered, or porous wood, however, the liquid can soak into the grain, leaving deeper stains that require more effort to remove.
Color Variations Explained
Carpenter bee excrement can range from bright yellow to dark brown, and the color often reflects the age of the residue and exposure to the elements.
Common color variations include:
- Bright yellow or golden: Usually indicates fresh activity and recent nesting.
- Light brown: Suggests the residue has been present for a short period and has begun to dry.
- Dark brown or grayish-black: Often points to older buildup that has weathered over time.
While color alone cannot determine the exact age of an infestation, darker and more extensive staining is often a sign that carpenter bees have been using the same nesting area for an extended period. If you notice multiple layers of stains beneath several holes, it’s worth inspecting the wood more closely for active tunnels and hidden damage.
Why Do Carpenter Bees Leave Stains on Wood?
To understand why carpenter bee stains appear, it helps to look at what is happening inside the wood rather than focusing only on the surface. When a female carpenter bee creates a nest, she drills a tunnel into the wood and divides it into a series of chambers where her offspring will develop. Each chamber is stocked with a mixture of pollen and nectar that serves as food for the larvae. As the nesting process continues, activity inside the tunnel naturally produces waste and moisture.
Within this enclosed nesting system:
- Organic waste accumulates over time
- Adult bees repeatedly enter and leave the tunnel
- Liquid waste and residue are expelled through the entrance hole
- Small amounts of wood dust and tunnel debris may mix with the material
Because this residue contains moisture, it does not simply fall to the ground like dry insect droppings. Instead, it adheres to the wood surface and slowly runs downward under the force of gravity. This creates the distinctive stains and streaks commonly seen below carpenter bee entry holes.
The location of the stain is often one of the strongest clues that carpenter bees are present. Unlike mildew, dirt, or water marks, carpenter bee staining usually begins at a specific point—the nest entrance—and extends downward from there. For this reason, inspectors and pest management professionals often use these stains as an early indicator of active nesting activity, even when the tunnel itself is difficult to see.
How to Clean Carpenter Bee Droppings from Wood Safely

Removing carpenter bee stains may seem straightforward, but using the wrong cleaning method can damage the wood or leave behind discoloration. In many cases, homeowners focus on cleaning the visible stains before addressing the nest itself, only to see the marks return a few days later. For the best results, follow these steps carefully.
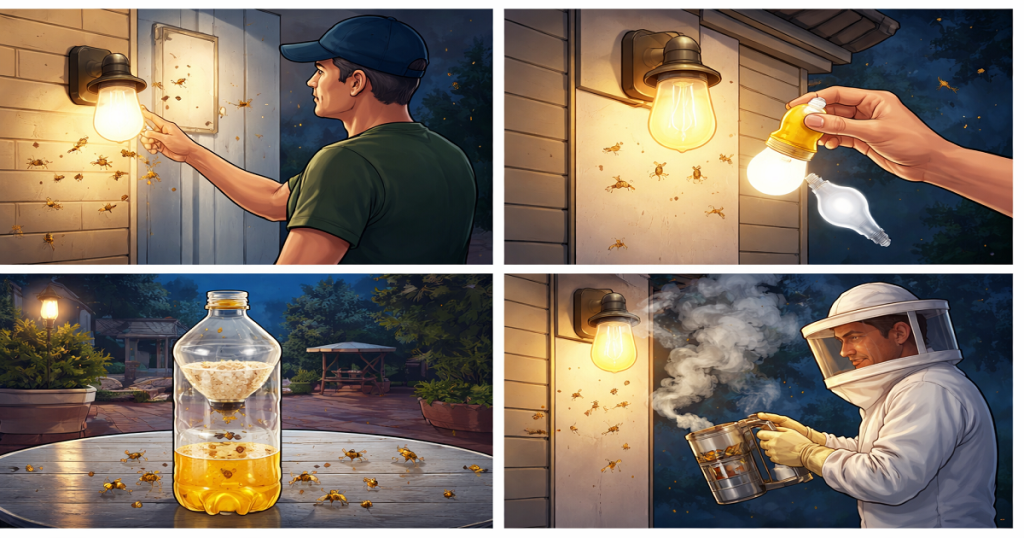
Step 1: Confirm the Nest Is No Longer Active
Before cleaning, check whether carpenter bees are still using the tunnel. If you notice bees entering or exiting the hole, the nesting site is active, and new stains will likely appear after cleaning.
Look for signs such as:
- Bees hovering around the same area repeatedly
- Fresh yellow or amber staining
- New wood debris beneath the hole
If activity is ongoing, it’s best to address the infestation first and clean the stains afterward. This prevents wasted effort and helps ensure a longer-lasting result.
Step 2: Select the Right Cleaner for the Surface
Different wood surfaces respond better to different cleaning solutions. Choosing the appropriate cleaner helps remove stains without damaging the material.
General guidelines include:
- Painted wood or siding: A mild vinegar-and-water solution is often effective.
- Raw, unfinished, or porous wood: Oxygen bleach can help lift deeper stains without the harsh effects of chlorine bleach.
- Fresh residue: Warm water and a small amount of dish soap may be enough to remove recent deposits.
Avoid using chlorine bleach whenever possible. While it may lighten stains temporarily, it can discolor wood, damage finishes, and weaken wood fibers over time.
Step 3: Allow the Cleaner Time to Work
One of the most common mistakes is scrubbing immediately after applying a cleaner. Instead, apply the solution generously and allow it to sit for several minutes. This dwell time helps break down the organic material in the residue, making it easier to remove with less effort and less risk of surface damage.
Step 4: Remove the Stain Gently
Using a soft-bristle brush, scrub lightly in the direction of the wood grain.
Avoid aggressive scrubbing, which can:
- Remove paint or protective coatings
- Roughen the wood surface
- Spread the stain into surrounding areas
A gentle approach is usually more effective and helps preserve the appearance of the wood.
Step 5: Rinse and Let the Surface Dry Completely
Once the stain has been removed, rinse away any remaining cleaner and residue with clean water. Then allow the area to dry thoroughly before applying any sealants, paints, or protective finishes. Complete drying is important because excess moisture can contribute to wood deterioration and create conditions that attract future pest activity.
How to Stop Carpenter Bee Stains Permanently
Cleaning existing stains is only part of the solution. If the underlying nesting activity isn’t addressed, new stains will continue to appear season after season. The most effective approach is to combine cleaning, prevention, and long-term wood protection.
To stop carpenter bee stains from returning, follow these key steps:
Identify the Source of the Problem
Start by locating all active and inactive nesting holes. Look for round entry holes, fresh staining, hovering bees, or small amounts of wood debris beneath wooden structures. Identifying every nesting site is essential because even a single overlooked tunnel can become a source of future activity.
Clean Existing Stains Thoroughly
Once you’ve confirmed that the nesting site is inactive or has been treated, remove all visible residue from the affected area. Cleaning away stains not only improves appearance but also makes it easier to monitor for new activity later.
Eliminate or Deter Active Carpenter Bees
If carpenter bees are still present, address the infestation before making repairs. Depending on the situation, this may involve applying an appropriate treatment, using preventative measures, or consulting a pest management professional for larger infestations.
Seal and Repair Nesting Holes
After the bees are no longer active, fill and seal all entry holes and damaged areas. Proper repairs help prevent carpenter bees from reusing old tunnels and reduce the likelihood of new nesting activity in the same location.
Protect Exposed Wood
Carpenter bees are often attracted to unfinished, weathered, or unprotected wood. Applying paint, stain, sealant, or another protective coating creates a less appealing surface and helps reduce future nesting opportunities.
Pay special attention to:
- Decks and railings
- Eaves and fascia boards
- Porch ceilings
- Fences and pergolas
- Wooden siding and trim
Monitor During the Next Active Season
Even after treatment and repairs, periodic inspections are important. Carpenter bees often return to areas where nesting has occurred in the past. Check vulnerable wood surfaces during spring and early summer for new holes, fresh stains, or bee activity.
A Long-Term Prevention Strategy
The most successful homeowners focus on prevention rather than repeated cleanup. By combining nest removal, proper repairs, and wood protection, you can stop the conditions that cause carpenter bee stains in the first place.
Instead of repeatedly washing away residue, you’ll be addressing the root cause—helping protect both the appearance and structural integrity of your wood surfaces for years to come.
Frequently Asked Questions (FAQs)
What does carpenter bee poop look like?
It appears as yellow or brown stains, often streaking downward from a hole in wood.
Do carpenter bees leave droppings?
Yes, they produce both liquid and solid waste, which causes visible staining.
Are carpenter bee droppings harmful?
They are not dangerous but indicate active nesting and potential wood damage.
How do I remove carpenter bee stains from siding?
Use vinegar or oxygen bleach, scrub gently, and rinse thoroughly.
Why do carpenter bees stain wood?
Their waste drips from nesting tunnels, creating visible streaks.
How do I identify carpenter bee waste?
Look for stains below round holes along with sawdust and bee activity.
Can carpenter bee stains be permanent?
Yes, if not cleaned early, they can penetrate wood and become difficult to remove.
What’s the best cleaner for carpenter bee waste?
Oxygen bleach for deep stains and vinegar for lighter cleaning.
Conclusion
Carpenter bee excrement is more than just an unsightly mess—it’s one of the clearest indicators of active nesting and potential structural damage. By learning how to identify carpenter bee droppings, understanding why they occur, and applying proper cleaning and prevention techniques, you can protect your home effectively. The key takeaway is simple: Don’t just clean the stain—solve the cause. With proper inspection, safe cleaning methods, and consistent wood protection, you can eliminate both the mess and the problem behind it.